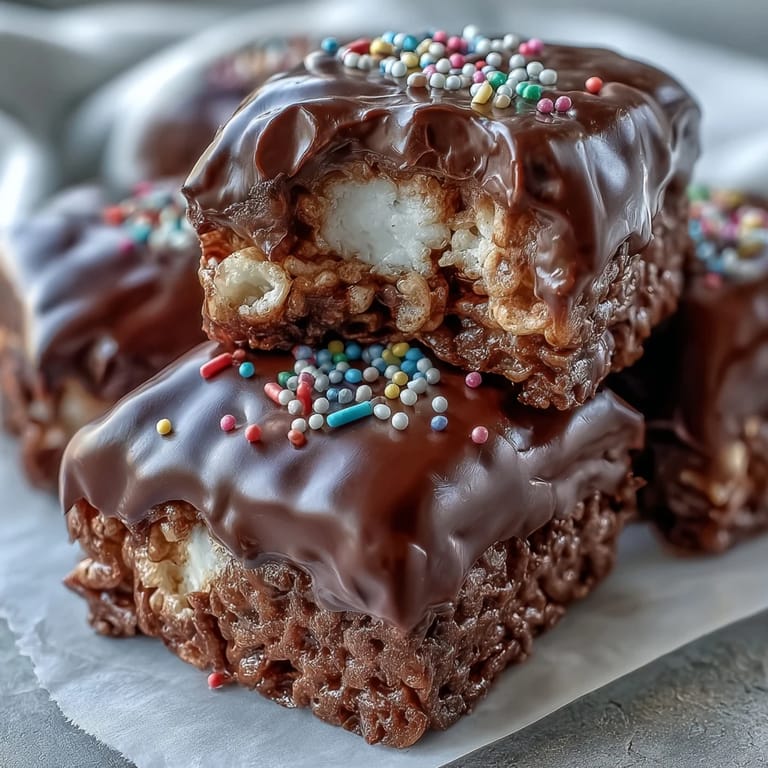
 Save to Pinterest
 I was standing in my kitchen on a rainy Saturday afternoon, staring at a box of cereal and a bag of marshmallows, when the idea hit me. My niece had asked for something sweet but fun, and I remembered how much I loved Rice Krispy treats as a kid. But this time, I wanted to take them further—dip them in chocolate, add some color, and turn them into something that felt special. The moment I poured that glossy chocolate over the crispy base, I knew I'd created something worth making again and again.
The first time I brought these to a potluck, they disappeared before the main course even hit the table. People kept asking if I'd ordered them from a confectionery, and I just smiled, knowing how simple they really were. One friend even took a photo before grabbing her second piece, saying they were too pretty to eat. That moment reminded me that presentation and a little extra effort can turn humble ingredients into something people remember.
Ingredients
- Unsalted butter: This is what melts the marshmallows into that gooey, golden base, and using unsalted lets you control the sweetness without any harsh salty notes.
- Mini marshmallows: They melt faster and more evenly than the large ones, giving you a smooth, consistent mixture that coats every piece of cereal.
- Rice Krispies cereal: The star of the show, providing that signature snap and crunch that holds up beautifully even under a layer of chocolate.
- Fine sea salt: A tiny pinch balances the sweetness and makes the chocolate taste even richer, though you can skip it if you prefer pure sugary bliss.
- Semisweet or dark chocolate chips: I like semisweet for a balanced flavor, but dark chocolate makes these feel more sophisticated and less candy like.
- Vegetable oil or coconut oil: Just a teaspoon thins the chocolate slightly so it spreads like silk and sets with a glossy, professional finish.
- Rainbow sprinkles or chopped nuts: These add a pop of color and texture, turning simple treats into something festive and fun.
Tired of Takeout? 🥡
Get 10 meals you can make faster than delivery arrives. Seriously.
One email. No spam. Unsubscribe anytime.
Instructions
- Prep your pan:
- Grease your square pan generously with butter so the mixture releases easily later. If you have parchment paper, line it now and let the edges hang over for an easy lift.
- Melt the butter:
- Set your saucepan over low heat and melt the butter slowly, stirring constantly to keep it from browning. You want it liquid and golden, not sizzling or toasted.
- Add the marshmallows:
- Toss in the mini marshmallows and keep stirring until they melt into a smooth, glossy pool. This takes a few minutes, so be patient and keep the heat low to avoid scorching.
- Season the mixture:
- Pull the pan off the heat and stir in the sea salt if you're using it. This is also the moment to add a splash of vanilla if you want extra warmth and depth.
- Fold in the cereal:
- Add the Rice Krispies and fold gently with a spatula until every piece is coated in marshmallow. Work quickly but carefully so you don't crush the cereal.
- Press into the pan:
- Scrape the mixture into your prepared pan and press it down firmly with a buttered spatula or your hands. The more evenly you press, the neater your bars will be.
- Let it rest:
- Leave the pan on the counter for about ten minutes so the base cools slightly and firms up. This makes it easier to spread the chocolate without disturbing the layer underneath.
- Melt the chocolate:
- Combine the chocolate chips and oil in a microwave safe bowl and heat in thirty second bursts, stirring after each, until the chocolate is smooth and glossy. Don't rush this step or you'll end up with seized chocolate.
- Pour and spread:
- Pour the melted chocolate over the cooled cereal base and spread it evenly with an offset spatula or the back of a spoon. Work quickly before the chocolate starts to set.
- Add the finishing touch:
- Scatter your sprinkles or chopped nuts over the chocolate immediately while it's still wet. Once it sets, they won't stick, so don't wait.
- Let it set:
- Leave the pan at room temperature for at least an hour, or pop it in the fridge for twenty to thirty minutes if you're in a hurry. The chocolate needs to be completely firm before you cut.
- Cut and serve:
- Lift the block out of the pan using the parchment overhang, or flip it onto a cutting board. Use a sharp knife to cut clean bars, wiping the blade between cuts for neat edges.
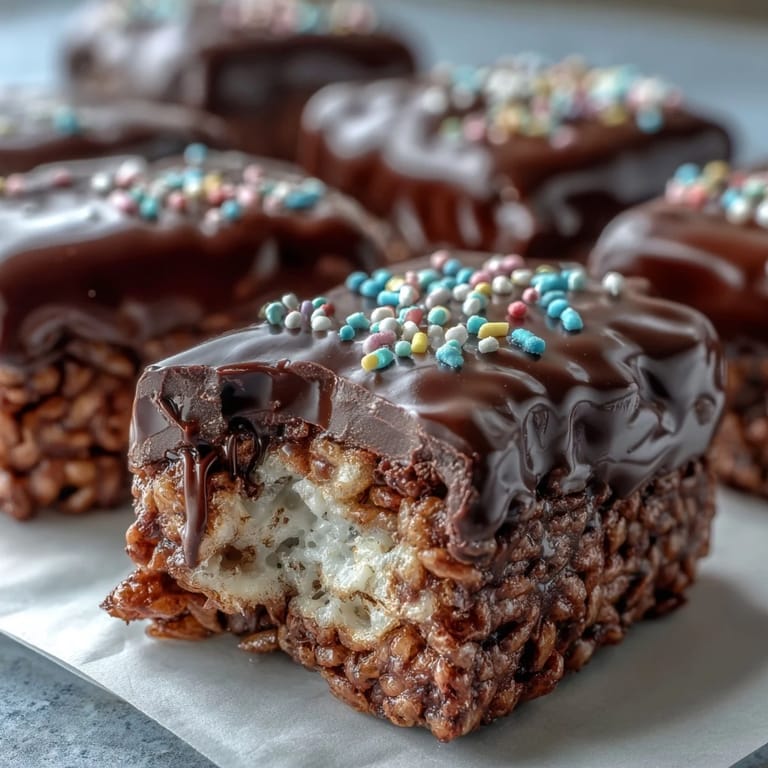 Save to Pinterest
 One evening, my neighbor knocked on my door holding an empty plate and asked if I had any more of those chocolate treats left. She said her kids had devoured the ones I'd sent over and were begging for seconds. I handed her a few extras wrapped in wax paper, and she hugged me like I'd just handed her gold. That small moment reminded me how food—even something as simple as cereal and chocolate—can create unexpected joy and connection.
How to Store and Keep Them Fresh
I've learned the hard way that leaving these out uncovered turns the chocolate dull and the cereal soft. Stack them in an airtight container with parchment paper between layers, and they'll stay crisp and glossy for up to three days on the counter. If your kitchen runs warm, the fridge is your friend—they'll keep for a week and taste just as good cold, with a satisfying snap when you bite through the chocolate.
Flavor Twists Worth Trying
After making these a dozen times, I started playing with the formula. A handful of mini chocolate chips folded into the cereal mixture before pressing adds little pockets of extra chocolate. Swapping the semisweet chocolate for white chocolate and using pastel sprinkles turns them into perfect springtime or baby shower treats. I've even stirred a tablespoon of peanut butter into the melted marshmallows for a subtle nutty richness that pairs beautifully with dark chocolate.
Troubleshooting and Quick Fixes
The most common mistake I see is overheating the marshmallows, which makes them stiff and hard to stir. Keep your heat low and stir constantly, and if they do seize up, a teaspoon of water stirred in can bring them back to life. If your chocolate looks grainy or streaky, it probably got too hot—next time, use lower power in the microwave and stir more frequently. And if the bars won't release from the pan, run a butter knife around the edges and warm the bottom of the pan with a hot towel for a few seconds.
- Use a pizza cutter for perfectly straight, effortless cuts through the chocolate.
- Wrap individual bars in cellophane and tie with ribbon for party favors or lunchbox surprises.
- Store cut bars in the freezer for up to a month and thaw at room temperature for fifteen minutes before serving.
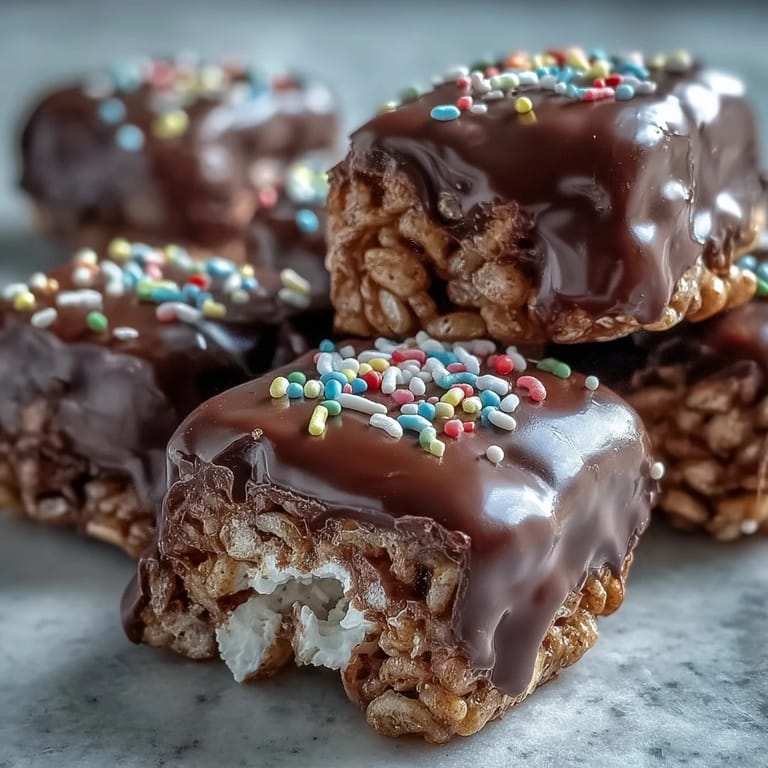 Save to Pinterest
 These treats have become my go to whenever I need something quick, impressive, and guaranteed to make people smile. Whether you're packing them for a bake sale or just treating yourself on a quiet afternoon, they deliver every single time.
Recipe Questions & Answers
- → How do I prevent the chocolate from cracking when cutting?
Let the chocolate set completely at room temperature rather than refrigerating. If you do chill them, bring to room temperature for 15 minutes before cutting with a sharp knife warmed in hot water.
- → Can I use different types of chocolate?
Absolutely. Semisweet, dark, milk chocolate, or even white chocolate work beautifully. Just keep in mind that milk and white chocolate are softer and may need extra chilling time to set firmly.
- → Why is my marshmallow mixture hard to work with?
The mixture can become stiff if it cools too much. Work quickly after combining the cereal and marshmallows. Lightly buttering your hands or spatula also helps prevent sticking while pressing into the pan.
- → How long will these stay fresh?
Store in an airtight container at room temperature for up to 3 days. For longer storage, refrigerate for up to a week. If layering, place parchment paper between bars to prevent sticking.
- → Can I make these without a stove?
Yes. Melt butter and marshmallows in the microwave in 30-second intervals, stirring between each. Add the cereal and proceed as directed. The chocolate topping can also be melted in the microwave.