 Save to Pinterest
 My kitchen smelled like a citrus grove the morning I first tested these orange rolls, and honestly, it was an accident born from leftover orange juice and a craving for something brighter than the usual cinnamon swirl. I'd been standing at my counter, juggling a zester and wondering if fresh orange could actually work in a roll, when my neighbor stopped by and just said, "That smells like breakfast heaven." That's when I knew I was onto something worth perfecting.
I made these for my book club once, and watching everyone pause mid-conversation to savor that first bite was worth every minute of the prep. Someone asked if they were from a bakery, and I won't lie, I felt a little proud standing there in my flour-dusted apron, knowing I'd created something that tasted like a professional made it in my very ordinary kitchen.
Ingredients
- All-purpose flour: The foundation that needs to be measured by weight if you have a scale, because scooping and leveling can pack the flour and throw off your whole dough.
- Active dry yeast: Make sure it's fresh and not sitting in your cabinet since last year, or your rolls won't rise with that beautiful puffy texture.
- Whole milk and fresh orange juice: Together they create a liquid base that's warm enough to activate the yeast but cool enough not to kill it, roughly around 110°F.
- Orange zest: This is where the magic happens, so use a microplane zester to get the bright colored oils without the bitter white pith underneath.
- Unsalted butter: Both in the dough and filling, it should be soft enough to spread easily but not melted into a puddle.
- Cream cheese and powdered sugar: These create a frosting that's thick enough to spread but light enough not to weigh down the warm rolls.
Tired of Takeout? 🥡
Get 10 meals you can make faster than delivery arrives. Seriously.
One email. No spam. Unsubscribe anytime.
Instructions
- Bloom Your Yeast:
- Combine warm milk, orange juice, sugar, and yeast in a large bowl and let it sit for 5 to 10 minutes until it becomes foamy and smells alive. This visual proof tells you the yeast is ready to work its magic.
- Build Your Dough:
- Stir in melted butter, orange zest, eggs, and salt into your foamy mixture, then gradually add flour while mixing until a soft, slightly sticky dough comes together. Knead for 8 to 10 minutes by hand or with a stand mixer until the dough becomes smooth and elastic, adding just a whisper more flour if it's too wet.
- First Rise:
- Transfer dough to a greased bowl, cover it loosely with plastic wrap or a damp towel, and tuck it into a warm corner of your kitchen for about an hour until it's doubled in size. A warm oven with the light on works beautifully for this.
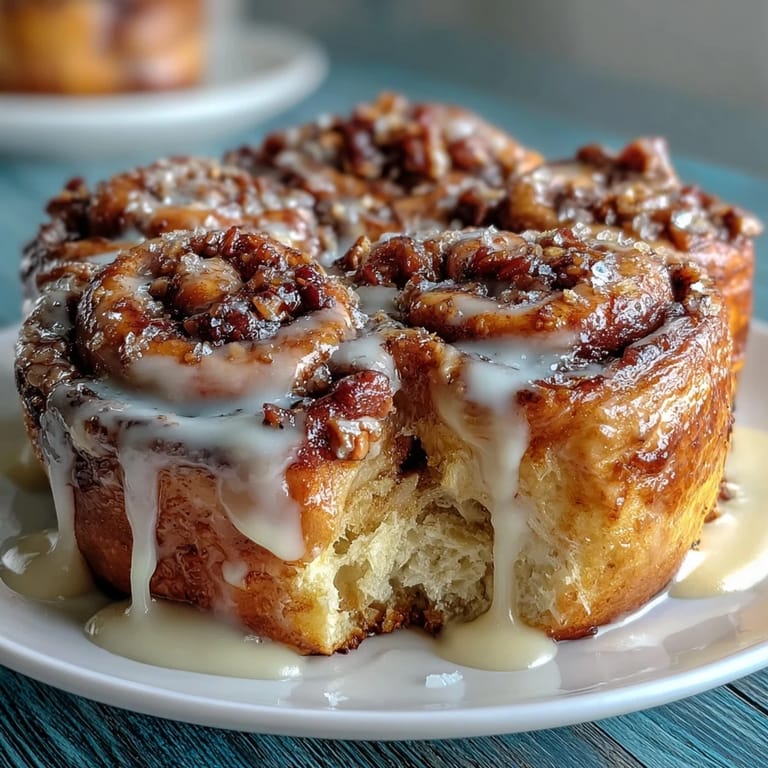
- Prepare the Filling:
- Mix granulated sugar with orange zest in a small bowl, rubbing them together with your fingers to release those gorgeous aromatic oils that will perfume every swirl. The mixture should smell intensely citrusy and look damp.
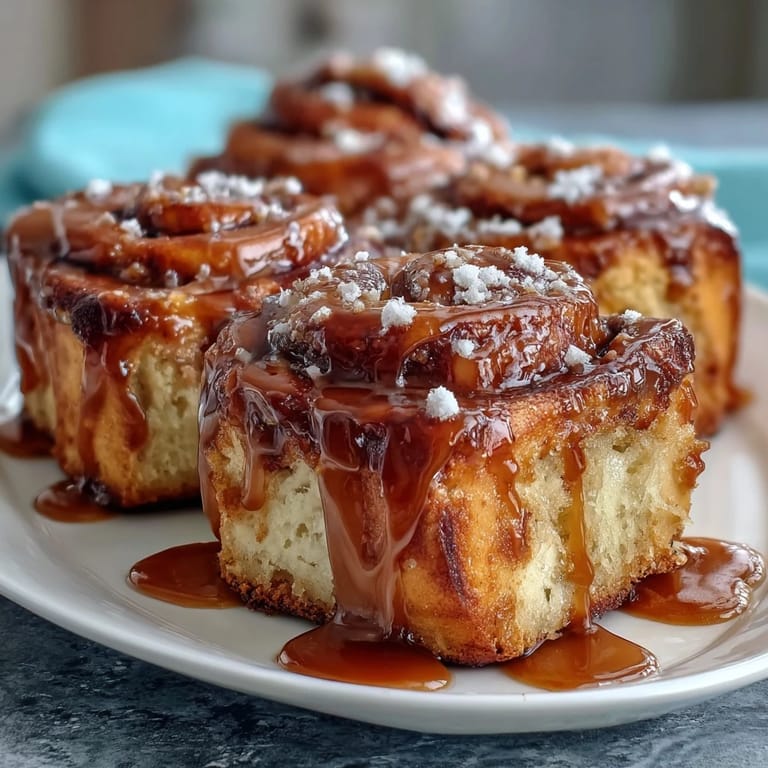
- Shape Your Rolls:
- Punch down the dough gently, roll it out on a lightly floured surface into a 16 by 10 inch rectangle, then spread softened butter over the entire surface and sprinkle the orange sugar mixture evenly across. Starting from the long side, roll tightly into a log and use a sharp knife or dental floss to cut it into 12 equal rolls.
- Second Rise:
- Arrange rolls in a greased 9 by 13 inch baking dish, cover them, and let them puff up for 30 to 40 minutes until they're puffy and touching each other slightly. They should look nearly ready to bake but not quite golden.
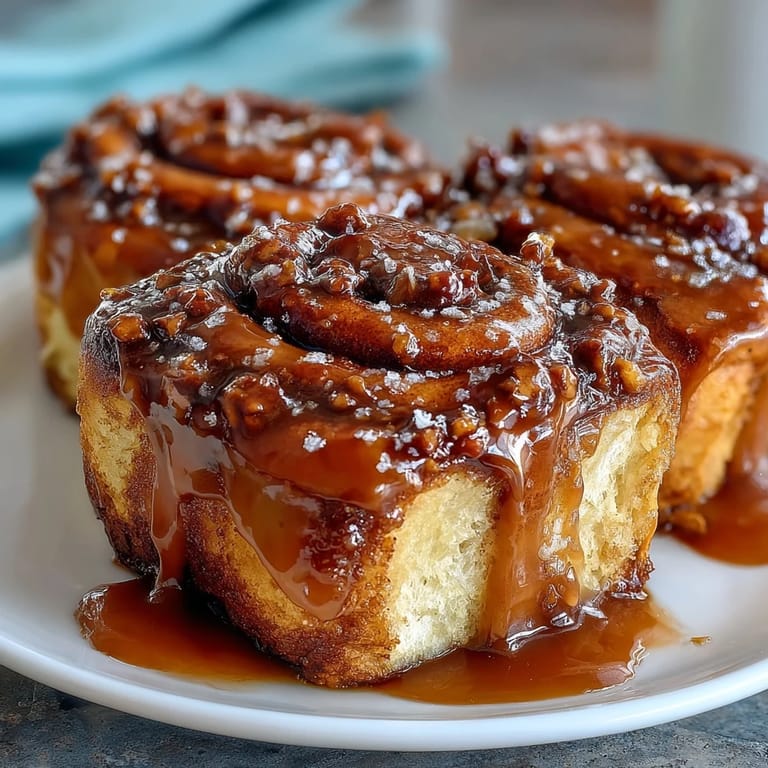
- Bake Until Golden:
- Preheat your oven to 350°F and bake the rolls for 22 to 25 minutes until they're a beautiful golden brown on top and a toothpick inserted into the center comes out clean. The kitchen will smell absolutely incredible at this point.
- Make the Frosting:
- While rolls bake, beat softened cream cheese and butter together until smooth, then add powdered sugar, fresh orange juice, zest, vanilla, and a pinch of salt, beating until creamy and spreadable. Taste it and smile.
- Frost and Serve:
- Let the rolls cool for about 10 minutes so the frosting doesn't melt off immediately, then spread it generously over the warm rolls while they're still just slightly warm to the touch.
 Save to Pinterest
 There was this quiet moment when I pulled the rolls from the oven and the morning light caught the frosting spreading across them, making them look almost jeweled. My partner walked in and just said, "These are why you bake," and honestly, that's when I understood that some recipes aren't just about feeding people, they're about creating a moment worth remembering.
Make Ahead Magic
One of my favorite discoveries was realizing these rolls actually prefer to be made the night before, so I started shaping them, covering the baking dish tightly with plastic wrap, and sliding everything into the fridge overnight. In the morning, I just let them come to room temperature on the counter while my coffee brewed, and they rose beautifully without any fussy timing, plus the flavors seemed to deepen as they sat.
The Perfect Citrus Balance
The key to these rolls tasting refined rather than one-note citrus is understanding that orange appears three times in the recipe, each time in a different way: first subtly in the dough, then more boldly in the filling, and finally bright and fresh in the frosting. This layering means you get complexity instead of that sharp orange candy flavor that some recipes accidentally create.
Pairing and Storage
These rolls taste absolutely divine paired with Earl Grey tea because the bergamot echoes the orange without competing, or with a fresh glass of orange juice for those who want to lean fully into the citrus moment. Store any leftovers in an airtight container at room temperature for up to three days, though honestly they rarely last that long in my house.
- If you want extra citrus punch, stir a few drops of orange extract into the frosting right before spreading it on warm rolls.
- A sharp knife dipped in hot water between cuts gives you cleaner roll edges than dental floss, though floss absolutely works if that's what you have on hand.
- These freeze beautifully after baking, so you can thaw and reheat them for a fresh-tasting breakfast later in the week.
 Save to Pinterest
 These rolls have become my go-to when I want to impress without spending hours in the kitchen, and they've taught me that sometimes the most memorable breakfasts come from the simplest ingredients treated with a little creativity and care. Bake these, watch people's faces light up, and enjoy knowing you've made something truly special.
Recipe Questions & Answers
- → What gives the rolls their citrus flavor?
Fresh orange zest and juice are incorporated into the dough, filling, and frosting, delivering a vibrant citrus aroma and taste throughout.
- → How long should the dough rise for best results?
The dough needs about one hour to double in size in a warm spot, with a second rise of 30–40 minutes after shaping to ensure soft, airy rolls.
- → Can I prepare the orange rolls in advance?
Yes, you can shape the rolls, refrigerate overnight, and let them rise at room temperature before baking to save time.
- → What helps achieve the soft texture in the rolls?
A combination of milk, eggs, butter, and optimal kneading produces a tender, elastic dough that bakes into soft rolls.
- → How is the orange frosting made creamy but light?
Beating softened cream cheese with butter and powdered sugar, then adding fresh orange juice and zest, creates a smooth, flavorful frosting.