 Save to Pinterest
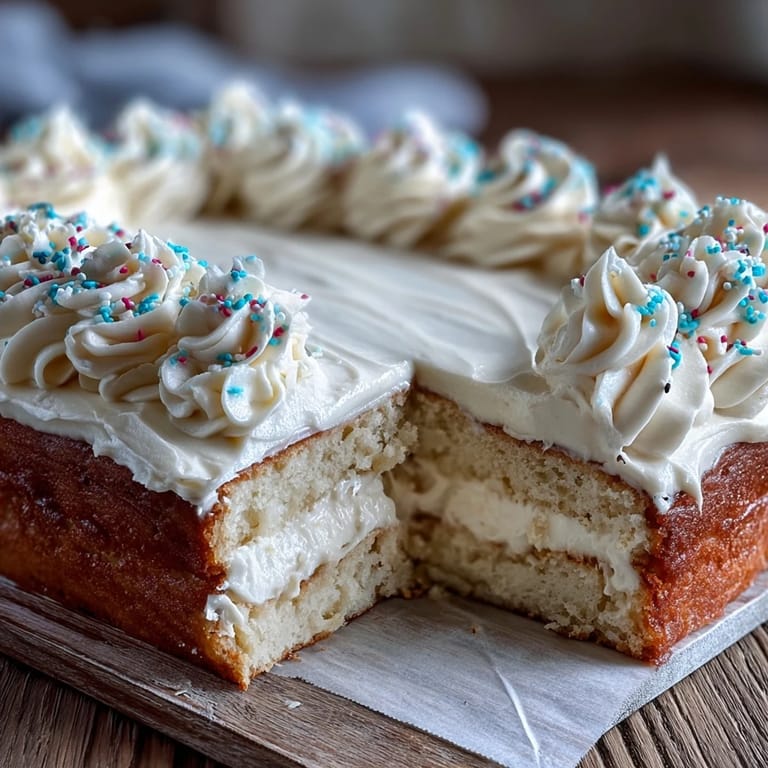
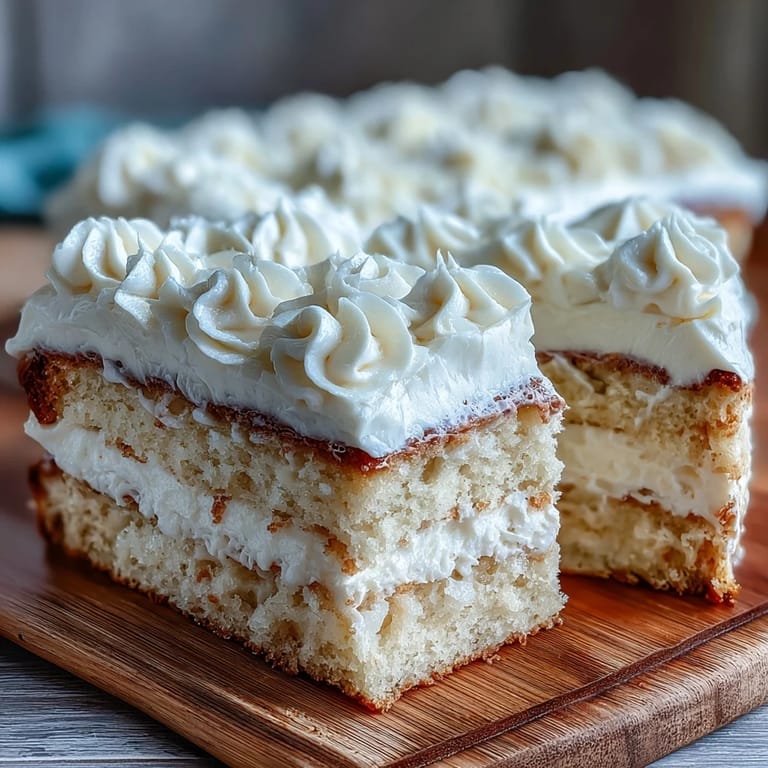
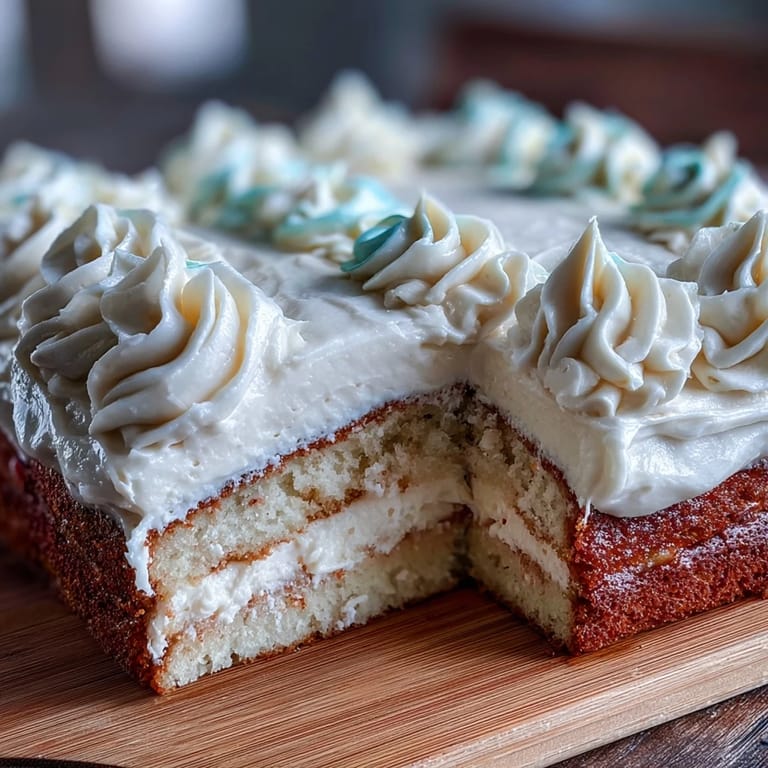
 My sister called me three weeks before her graduation, slightly panicked, asking if I could bake something for her party. Not a fancy tiered cake—just something that felt celebratory but wouldn't keep me in the kitchen all day. That's when I learned the magic of sheet cakes: they're unfussy, feed a crowd, and somehow taste even better when you top them with buttercream and pipe the year right across the top. Watching her friends gather around that cake, laughing as they tried to snap photos of the Class of 2026 piping, I realized this simple dessert had become the centerpiece of the whole celebration.
I'll never forget the moment I piped those numbers for the first time—my hand was shaking slightly because I wanted it to look perfect, and halfway through the five, my piping bag popped a tiny hole. Instead of panicking, I just laughed, let the frosting do its thing, and the slightly crooked numbers somehow looked more authentic. The graduates didn't care about perfection; they cared that someone had made them a cake that was specifically theirs.
Ingredients
- All-purpose flour (2 ½ cups): This is your foundation, so measure it correctly by spooning and leveling rather than scooping straight from the bag—it makes a real difference in how the cake rises.
- Baking powder (2 ½ tsp): Check that your baking powder is fresh before you start; old leavening is one of those silent recipe killers that nobody talks about.
- Salt (½ tsp): Just enough to make everything else taste more like itself, balancing sweetness without announcing its presence.
- Unsalted butter, softened (1 cup for cake, 1 cup for frosting): Softened means it should yield slightly when you press it with your finger—this is non-negotiable for creaming and frosting alike.
- Granulated sugar (1 ¾ cups): This sweetens the cake and aerates it when beaten with butter, creating that tender, fluffy crumb you're after.
- Large eggs, room temperature (4): Cold eggs won't blend smoothly into the batter, so leave them out while you prep everything else.
- Vanilla extract (1 tbsp for cake, 2 tsp for frosting): Real vanilla makes an audible difference; it brings warmth and depth that imitation versions struggle to match.
- Whole milk, room temperature (1 cup for cake, ¼ cup for frosting): Tempering the milk prevents the batter from seizing and helps the frosting reach that cloud-like consistency.
- Powdered sugar, sifted (4 cups): Sifting breaks up clumps and makes your frosting silky smooth instead of gritty.
- Food coloring: Gel coloring tints more vibrantly than liquid, and it doesn't thin out your frosting like drops can.
Tired of Takeout? 🥡
Get 10 meals you can make faster than delivery arrives. Seriously.
One email. No spam. Unsubscribe anytime.
Instructions
- Set up your workspace:
- Preheat the oven to 350°F and grease your 9x13-inch pan with butter, then line it with parchment paper—this guarantees your cake releases cleanly. Having everything measured and within arm's reach means you won't scramble mid-batter or overmix out of stress.
- Combine your dry ingredients:
- Whisk the flour, baking powder, and salt together in a bowl until they're evenly distributed. This step prevents streaks of baking powder in your baked cake, which I learned the hard way tastes oddly bitter in concentrated pockets.
- Cream butter and sugar:
- Beat them together for about three minutes until the mixture is pale and fluffy, almost like whipped frosting. This aeration is what gives your cake its tender, almost cloud-like texture instead of dense and heavy.
- Incorporate eggs one by one:
- Add each egg separately and beat well between additions so they emulsify fully into the batter. This creates structure and helps everything bind together smoothly.
- Add vanilla and alternate wet and dry:
- Mix in the vanilla, then add your flour mixture in three parts, alternating with the milk—beginning and ending with flour. The alternating method prevents overworking the gluten while ensuring even distribution of ingredients.
- Pour and bake:
- Transfer the batter to your prepared pan and smooth the top with a spatula so it bakes evenly. Bake for 30 to 35 minutes until a toothpick inserted in the center comes out with just a few moist crumbs, then let it cool completely in the pan.
- Make the frosting:
- Beat softened butter until creamy, then gradually add sifted powdered sugar along with milk, vanilla, and salt, beating for 3 to 5 minutes until it's light and fluffy. If you add the sugar all at once, you'll create a dusty cloud and risk overmixing.
- Frost and decorate:
- Spread a generous layer of buttercream over the cooled cake, then divide the remaining frosting into bowls and tint with your chosen colors. Pipe the class year or a celebratory message using a small round tip, then add sprinkles or edible decorations if desired.
 Save to Pinterest
 There's something deeply satisfying about watching someone's face light up when they realize a cake exists specifically to commemorate their achievement. This cake isn't about impressing with complexity; it's about showing up with something thoughtful and perfectly suited to the moment.
The Art of Sheet Cake Frosting
Sheet cakes seem deceptively simple until you try to frost them, and then suddenly you're thinking about crumb coats and whether your spatula is wide enough. I learned to use an offset spatula dipped in warm water—it glides across the cake like you actually know what you're doing, even when you're winging it slightly. The key is not overthinking it; a homey, rustic finish actually looks more inviting than trying for magazine-perfect smoothness.
Personalizing With Food Coloring and Piping
The moment you bring school colors or favorite shades into the frosting, this cake transforms from generic to unmistakably theirs. Gel food coloring gives you richer, more vibrant results than liquid, and a little goes a long way—start with a toothpick's worth and add more if needed. Piping might feel intimidating, but the Class of 2026 or any message you choose doesn't need to be calligraphy-perfect to feel meaningful.
Storage and Make-Ahead Strategy
This cake actually improves slightly after a day or two as the flavors settle, and the buttercream keeps everything moist without drying out. You can bake the cake a full day ahead and frost it the morning of your event, or even freeze the unfrosted cake for up to two weeks if life gets hectic. Just let everything come to room temperature before serving, and you'll taste the difference between a cold cake and one that's been sitting out long enough to release all its vanilla warmth.
- Cover the frosted cake loosely with plastic wrap if keeping it at room temperature for up to two days.
- Refrigerate for up to five days, but bring slices to room temperature before eating so the buttercream softens.
- If you've made the cake weeks ahead, store the unfrosted layers well wrapped in the freezer and frost after thawing.
 Save to Pinterest
 Graduation cakes are about celebrating someone's milestone, and this simple, buttery sheet cake does exactly that without unnecessary fuss. Bake it with intention, pipe those numbers with heart, and watch it become the memory they'll smile about for years.
Recipe Questions & Answers
- → What is the best way to ensure the cake is moist?
Use room temperature ingredients and avoid overmixing the batter to keep the cake tender and moist. The combination of butter and milk adds to the softness.
- → How can I customize the buttercream colors?
Add gel or liquid food coloring to portions of the frosting, using school colors or preferred shades for piping and decoration.
- → Can I prepare this cake in advance?
Yes, bake and frost the cake a day ahead; store it covered at room temperature or refrigerate to maintain freshness.
- → Are there alternatives for dietary restrictions?
Substitute non-dairy milk to make this suitable for dairy-free diets, while keeping other ingredients compatible.
- → How do I achieve smooth buttercream frosting?
Beat the butter first until creamy, then gradually add powdered sugar and milk, continuing to beat until fluffy and smooth.